VScode Extension
The OCM VScode Extension is a UI tool for OCM related Kubernetes resources. The extension has been built upon Visual Studio Code and offers additional OCM administrative and monitoring features in order to improve operational efficiency and accelerate development within engineering teams. The OCM VScode Extension provides tons of useful features, including easy to generate OCM related Kubernetes resources, automated local OCM environment creation and a simple and convenient monitoring view for cluster resources. Having an effective UI tool for managing your cluster is key to a healthy environment. With the right user interface, you can administer changes to the cluster, track resources, and troubleshoot issues more efficiently, without having to use numerous additional CLI tools.
Prerequisite
You must meet the following prerequisites to install the VScode Extension:
- Ensure your
Visual Studio Coderelease is at leastv1.71.0.
Some VScode Extension features require a few additional prerequisites:
-
To Manage Existing Resources ensure
kubectlis installed. -
To Create Local Environment ensure
kind,kubectlandclusteradmare all installed. -
To load Resources Snippets or create a Bootstrap Project no additional prerequisites are needed
Installation
Install Latest version
In your VScode instance, go to the Extensions Marketplace (by clicking on the Extensions icon in the composite bar on the left hand side or simply typing Ctrl+Shift+X).
Search for OCM Extension and click install.
Install specific version
To download a specific version of VScode Extention visit the releases page, expand the Assets section of the target version, and download the version for your operating system.
In your VScode instance, go to the Extensions Marketplace (by clicking on the Extensions icon in the composite bar on the left hand side or simply typing Ctrl+Shift+X).
Click the … at the top right corner of the palette, select the Install from VSIX… action, and browes for the specific VSIX file you downloaded.
Select a VSIX file and hit install.
Usage
Resources Snippets
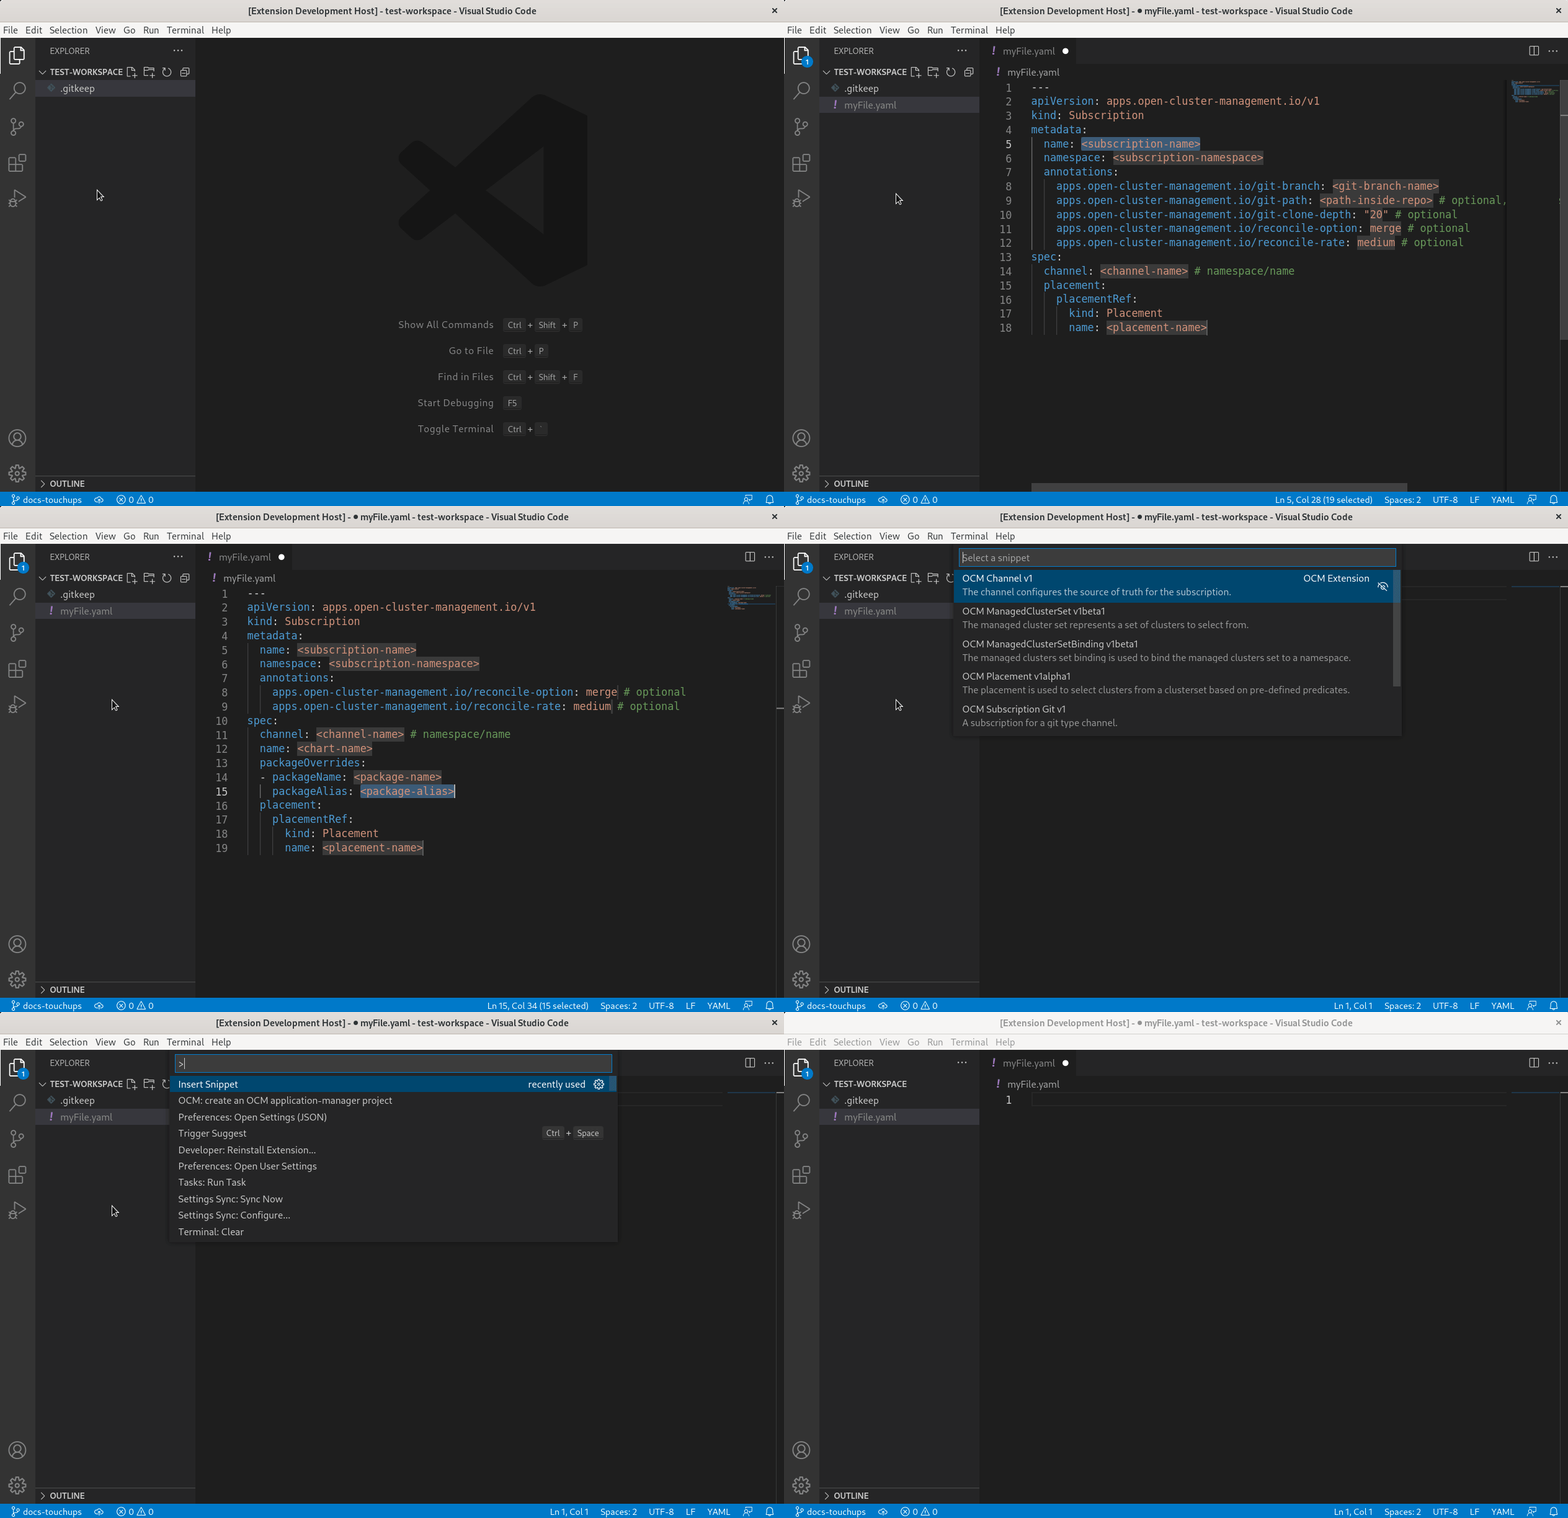
The VScode Extension allows users to load Custom Resource (CR) snippets from the command palette.
The resources available as snipperts are:
- Subscription
- Placement
- Channel
- ManagedClusterSet
- ManagedClusterSetBinding
Subscription snippets are available specifically tailored to either Git, Helm or ObjectBucket.
To exercise this feature you must take the following steps:
- Create a new yaml file in a desired path
- Open the file and press Ctrl+Shift+P on your keyboard
- In the search container at the top of your screen choose Snippets: Insert Snippet
- Choose a desired snippet from list

Bootstrap Project
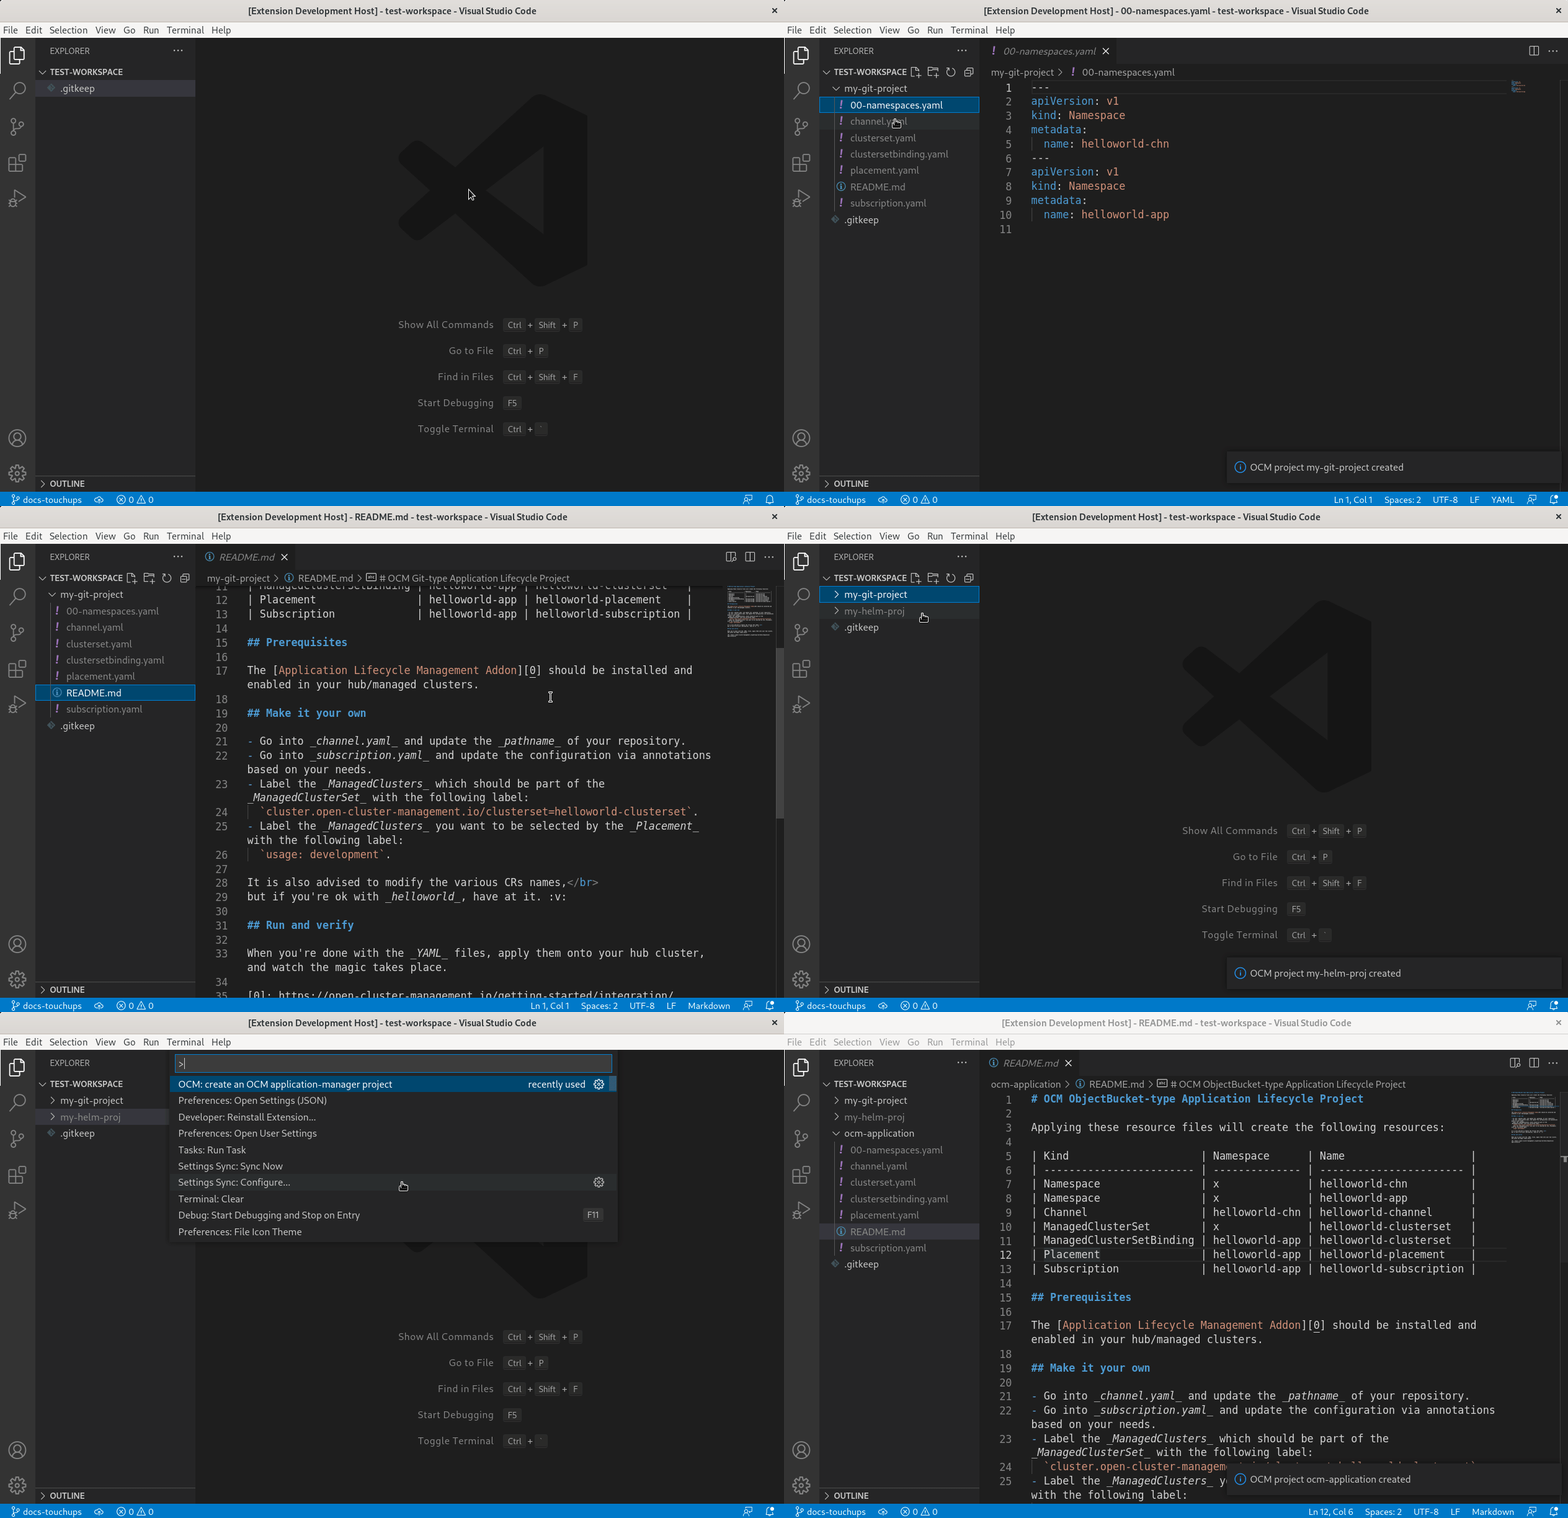
Another Valuable feature of the VScode Extension is to create a Bootstrap project for the various channel types.
The Bootstrap project is basically a collection of snippets, customized to fit one of three channel types - Git, Helm or ObjectBucket, that form a project template for you to build upon.
To exercise this feature you must take the following steps:
- Press Ctrl+Shift+P on your keyboard
- In the search container at the top of your screen choose OCM: Create an application-manager project
- Choose a desired channel type
- Type in a project name and hit enter

Create Local Environment
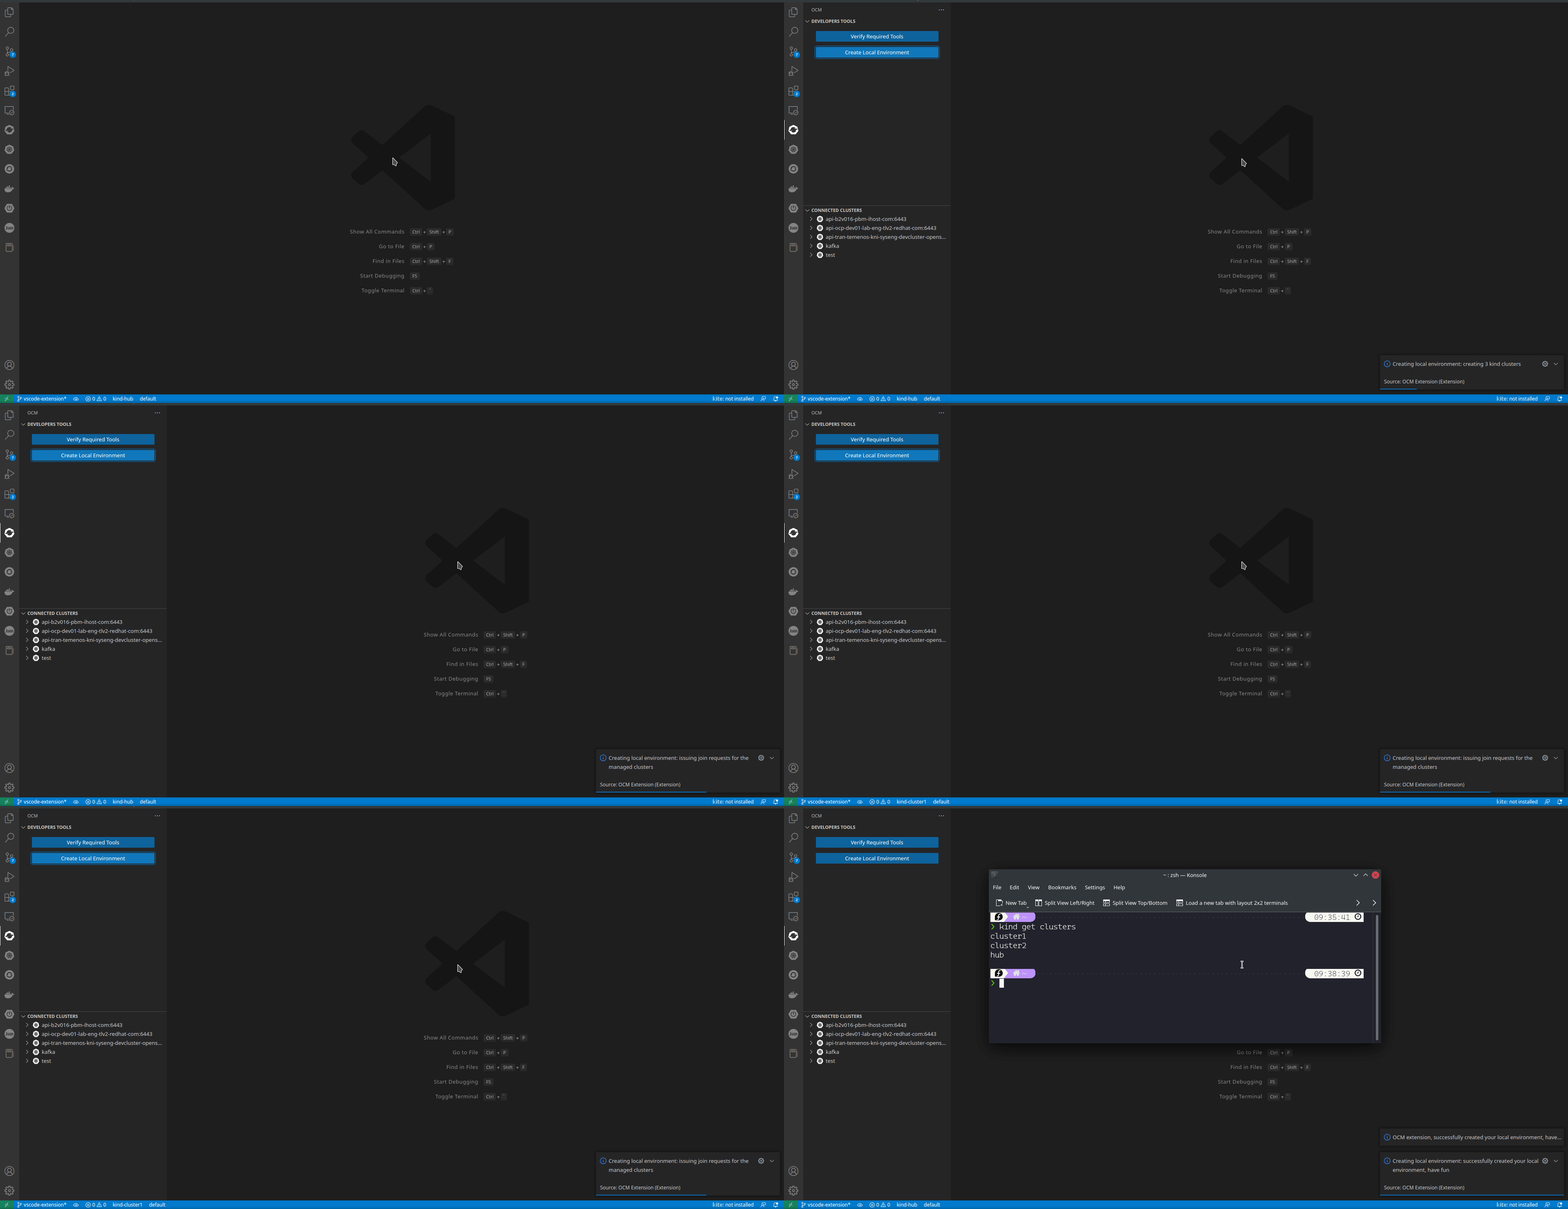
The Create Local Environment feature allows you to create a quick OCM multi-cluster control plane on a local kind environment with only a click of a button.
The feature does it all for you:
- Verifies the existence of the required tools.
- Creates as many kind clusters as you need (customizable).
- Initializes the hub cluster by installing a Cluster Manager using clusteradm, and kubectl.
- Installs a Klusterlet agent on the managed clusters and sends join requests to the hub cluster using clusteradm, and kubectl.
- Accepts the join requests from the hub cluster using clusteradm, and kubectl.
To exercise this feature you must take the following steps:
- Click on the OCM icon in the composite bar on the left hand side to open the VScode Extension control pane
- Locate the Create Local Environment button in the Developers Tools section and give it a click
- Notice that at the top of your screen an action container will prompt you to choose between default or custom configuration
- After configuration was specified, a progress bar at the botom right of your screen will provide feadback on the build process

Manage Existing Resources
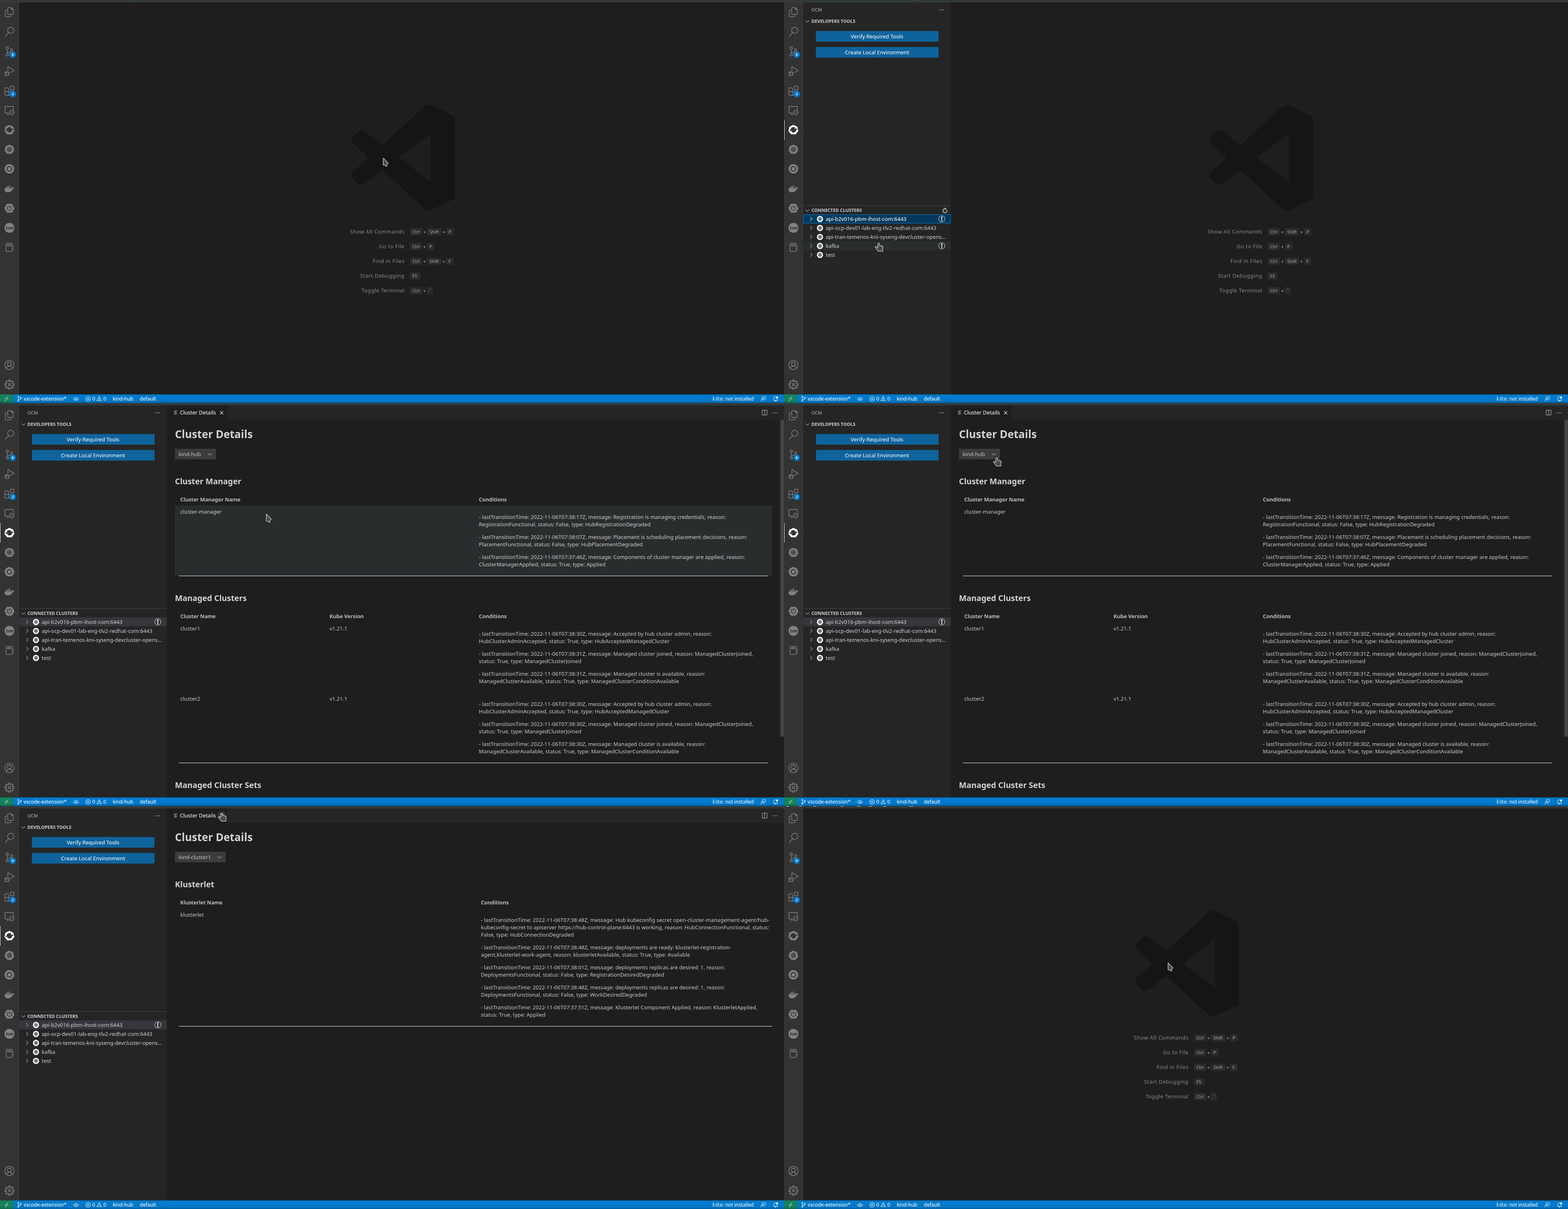
The Manage Existing Resources feature provides a wide and detailed overview of all the resources residing in any one cluster.
To exercise this feature you must take the following steps:
- Access the Cluster Details tab either by: * Pressing Ctrl+Shift+P on your keyboard and choosing OCM-View: Cluster Details in the search container at the top of your screen * Clicking on the OCM icon in the composite bar on the left hand side to open the VScode Extension control pane, locating the Connected Clusters section and selecting any cluster in the list
- Inside the Cluster Details tab, use the dropdown to select any cluster from the list of availabe clusters in order to view the resources within it

Related materials
Visit the VScode Extension on Github.